How Videoscopes Improve Inspection Accuracy in Aviation Maintenance

Inspection accuracy is one of the most important drivers of safe, efficient aviation maintenance. When technicians can see defects clearly, document them consistently, and communicate findings without ambiguity, decisions get better, and delays shrink. That is why videoscopes have become a staple across engine and airframe inspection tasks. Unlike basic visual checks or older optical-only systems, modern videoscopes provide high-resolution imaging, controlled lighting, and digital documentation that help teams reduce errors and improve repeatability. Companies like USA Borescopes support these maintenance workflows by offering inspection equipment designed to perform reliably in real aviation environments.
Why Inspection Accuracy Matters More Than Ever
Aviation maintenance decisions often hinge on fine details. A shallow nick may be acceptable, while a small crack in the wrong location can require immediate action. In many cases, the difference is not obvious from a quick glance, especially in tight access areas where angle and lighting can distort what the inspector sees.
Accuracy matters for three main reasons:
Safety and airworthiness
Defects that go undetected can propagate and lead to failures. Accurate inspection reduces the chance of missing early warning signs and improves confidence in the aircraft’s condition.
Cost control and maintenance planning
False calls can be expensive. If a harmless stain is mistaken for a crack, the result can be unnecessary removals, additional inspections, or parts replacement. Accurate visuals help teams avoid costly overreaction and focus resources where they are truly needed.
Documentation and accountability
Maintenance records increasingly require clear evidence. When an inspection includes high-quality images and consistent notes, it becomes easier to support engineering decisions, audit requirements, and trend monitoring over time.
High-Resolution Imaging Makes Defects Easier to Confirm
The most direct way videoscopes improve accuracy is by improving what the inspector can actually see. Higher resolution sensors and better optics deliver clearer images of small features, including surface texture changes that can indicate early cracking, oxidation, or coating damage.
Better clarity reduces missed findings
In hot section areas, defects can be subtle. Fine cracks may only show up at certain angles or under specific lighting. A sharper image increases the chance that the inspector notices these details early rather than after the defect grows.
Clearer visuals reduce false positives
Streaks, soot, staining, and reflections can mimic defects. With higher image quality, inspectors can better distinguish between surface contamination and true material change. This reduces unnecessary follow-up work and improves confidence in the inspection report.
Consistent image quality improves repeatability
A strong inspection program relies on repeatable results. If images are inconsistent from one inspection to the next, trend monitoring becomes difficult. Videoscopes that deliver consistent clarity help teams compare findings over time and make better decisions about whether a condition is stable or worsening.
Lighting Control Is a Major Accuracy Advantage

Lighting is often the deciding factor between a clear finding and an unclear one. Engine interiors include reflective metals, dark cavities, and surfaces with deposits that can absorb light. Videoscopes typically provide adjustable illumination that allows technicians to tune brightness to match the surface they are inspecting.
Managing glare on reflective surfaces
Turbine blades and other polished components can reflect light directly into the camera, washing out detail. Adjustable lighting lets inspectors reduce glare and reveal surface texture that might otherwise be hidden.
Improving contrast in dark inspection zones
Some areas inside an engine are difficult to illuminate evenly. Controlled lighting helps reduce shadowing and improve visibility on edges, cooling features, and transition areas where defects often begin.
Supporting defect confirmation from multiple angles
Lighting works best alongside articulation. When the inspector can adjust both the camera position and illumination level, they can confirm whether an indication is a defect or simply a reflection or stain.
Measurement Features Help Standardize Assessments
Many modern videoscopes include measurement capabilities that help inspectors estimate defect size directly on screen. While these tools do not replace engineering limits or maintenance manual guidance, they can improve consistency and reduce interpretation gaps between technicians.
More consistent defect descriptions
Instead of describing a defect vaguely, inspectors can document approximate length, width, or affected area. This helps engineering teams make faster calls and reduces repeated inspections caused by unclear reporting.
Supporting faster decision-making
When a defect is borderline, measurement data paired with clear images can help decision-makers determine whether the condition is within limits, needs monitoring, or requires action. That reduces delays and keeps maintenance planning on track.
Improving trend monitoring over time
When inspections are repeated, measurements help teams compare changes objectively. Even if the exact number is an estimate, a consistent technique can reveal whether a defect is stable or increasing.
Digital Documentation Improves Accuracy After the Inspection
Inspection accuracy is not only about what the technician sees in the moment. It is also about how well that finding can be reviewed, verified, and compared later. Videoscopes make this easier through image capture and storage.
Capturing still images for clear evidence
A high-quality still image freezes the view and prevents motion blur from affecting interpretation. It also allows the inspector to label the image with stage location, component area, and inspection date.
Recording short video sweeps for context
A still image shows detail. A short video sweep shows where that detail sits within the broader component. This context is often essential for engineering review, especially when the image must be interpreted by someone who was not present during the inspection.
Enabling remote review and collaboration
Many maintenance decisions involve multiple stakeholders. When images and videos are available immediately, engineering and quality teams can review findings quickly without repeating the inspection. This reduces errors caused by incomplete descriptions and shortens the time between inspection and action.
Videoscopes Reduce Human Error During Inspections
Even skilled inspectors are affected by fatigue, time pressure, and challenging access. Videoscopes reduce these risks by improving visibility and allowing a more deliberate inspection technique.
Improved viewing reduces rushed judgments
When the view is clear, inspectors can take the time to confirm what they are seeing. When the view is poor, there is pressure to guess. Videoscopes reduce that guesswork.
Better ergonomics support careful inspection
Many systems allow inspectors to view images on a screen rather than straining for a direct line of sight. This makes it easier to hold position, adjust angle, and capture evidence without rushing.
Standardized workflows become easier to follow
Videoscopes support checklists, baseline image sets, and consistent scan patterns. This reduces variability between technicians and improves overall program accuracy.
Practical Techniques That Improve Accuracy With Any Videoscope

Even the best tool benefits from disciplined technique. Maintenance teams that prioritize accuracy often focus on a few simple habits.
Stabilize before capturing images
Motion blur is one of the most common reasons images are not usable. Stabilizing the probe and holding the position for a moment before capture improves clarity and reduces rework.
Capture two views for each finding
A wider view provides context. A close-up view shows detail. Together, they reduce confusion during review and help locate the finding during follow-up inspections.
Maintain consistent orientation and labeling
If the same location is labeled differently each time, trend monitoring becomes unreliable. Consistent naming, stage references, and orientation notes improve comparison and reduce misinterpretation.
Build a baseline library
Capturing reference images even when no defects are found helps establish the normal appearance for a specific engine type and operating environment. This supports training and improves confidence during borderline assessments.
Selecting a Videoscope That Supports Accuracy
Accuracy comes from a combination of imaging, lighting, articulation, and documentation reliability. Teams comparing options often focus on these essentials:
- Image clarity under realistic lighting conditions
- Adjustable illumination for glare control
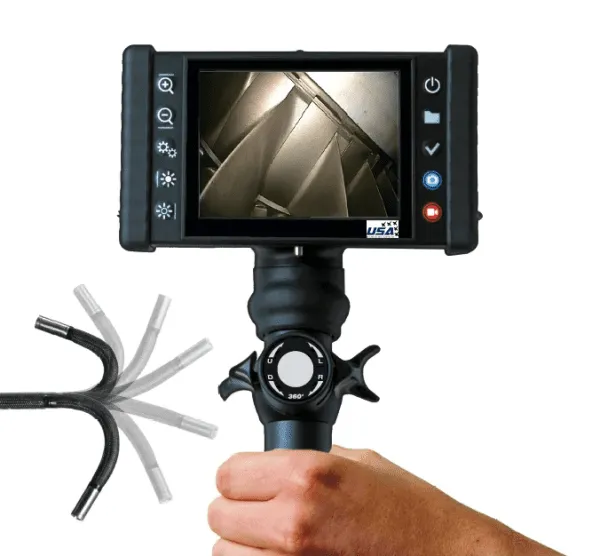
- Articulation that allows multiple viewing angles
- Reliable capture and storage for documentation
- Probe diameter and durability suited to common access ports
Maintenance organizations evaluating equipment options can explore configurations through the USA Borescopes products page, which can help teams compare capabilities based on typical aviation inspection needs.
Accuracy Starts With Better Visual Evidence
Videoscopes improve inspection accuracy by making defects easier to see, easier to confirm, and easier to document. High-resolution imaging reduces missed findings and false positives. Lighting control helps reveal surface texture and prevents glare from hiding defects. Measurement and documentation tools standardize reporting and improve decision-making across the maintenance team.
Consistent inspections depend on more than technician skill—they require tools that support repeatable workflows and reliable documentation. USA Borescopes provides aviation-focused inspection solutions built to improve inspection consistency across maintenance operations. To discuss inspection requirements or equipment selection, teams can contact USA Borescopes for guidance.
About the Author
The author is an aviation inspection specialist with extensive experience in remote visual inspection and maintenance documentation practices. They focus on practical inspection techniques, defect recognition, and workflow standardization that improve consistency across teams. Their guidance is based on real maintenance environments where tight access, clear evidence, and accurate decisions are essential for safe operations.


